
B.O.S. Lock Quick Start Guide
Always ensure that the firearm is cleared and rendered safe
Programming procedure:
Entering Program Mode
- Insert programming tool into 'P' port and press program button, blue light will flash.
Registering Fingerprints
- Press pad of right index finger on sensor for one second, lift for one second, press back on in same position, and repeat process until LED flashes green.
- Finger orientation should be similar to extending your trigger finger for trigger discipline.
- To register another fingerprint, re-enter programming mode and repeat process.
Clearing Fingerprints
- Insert programming tool into 'C' port until white light flashes, then remove tool.
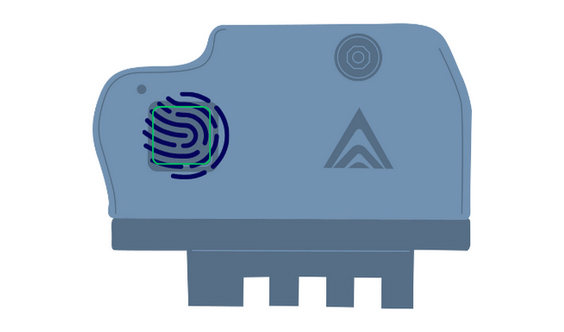
Example of first fingerprint placement:
* Charge device before programming and installing.
Installation procedure:
* Provided proprietary tools and bolt must be used for proper installation.

Preparing for Installation
- To open retention arm, activate B.O.S. Lock with programmed fingerprint.
- With arm opened, slide device fully onto rail with programming ports facing trigger guard.
- Ports will be inaccessible once device is installed.
Securing Lock
- Insert bolt from sensor side and tighten with install tool until secure.
Finalizing Installation
- Pull firearm slide back while pushing retention arm in front of slide, release hand from slide.
- If installed properly, B.O.S. Lock arm will securely lock firearm slide, preventing cycling.