
Fusion Mounting Holster and Plate Quick Start Guide
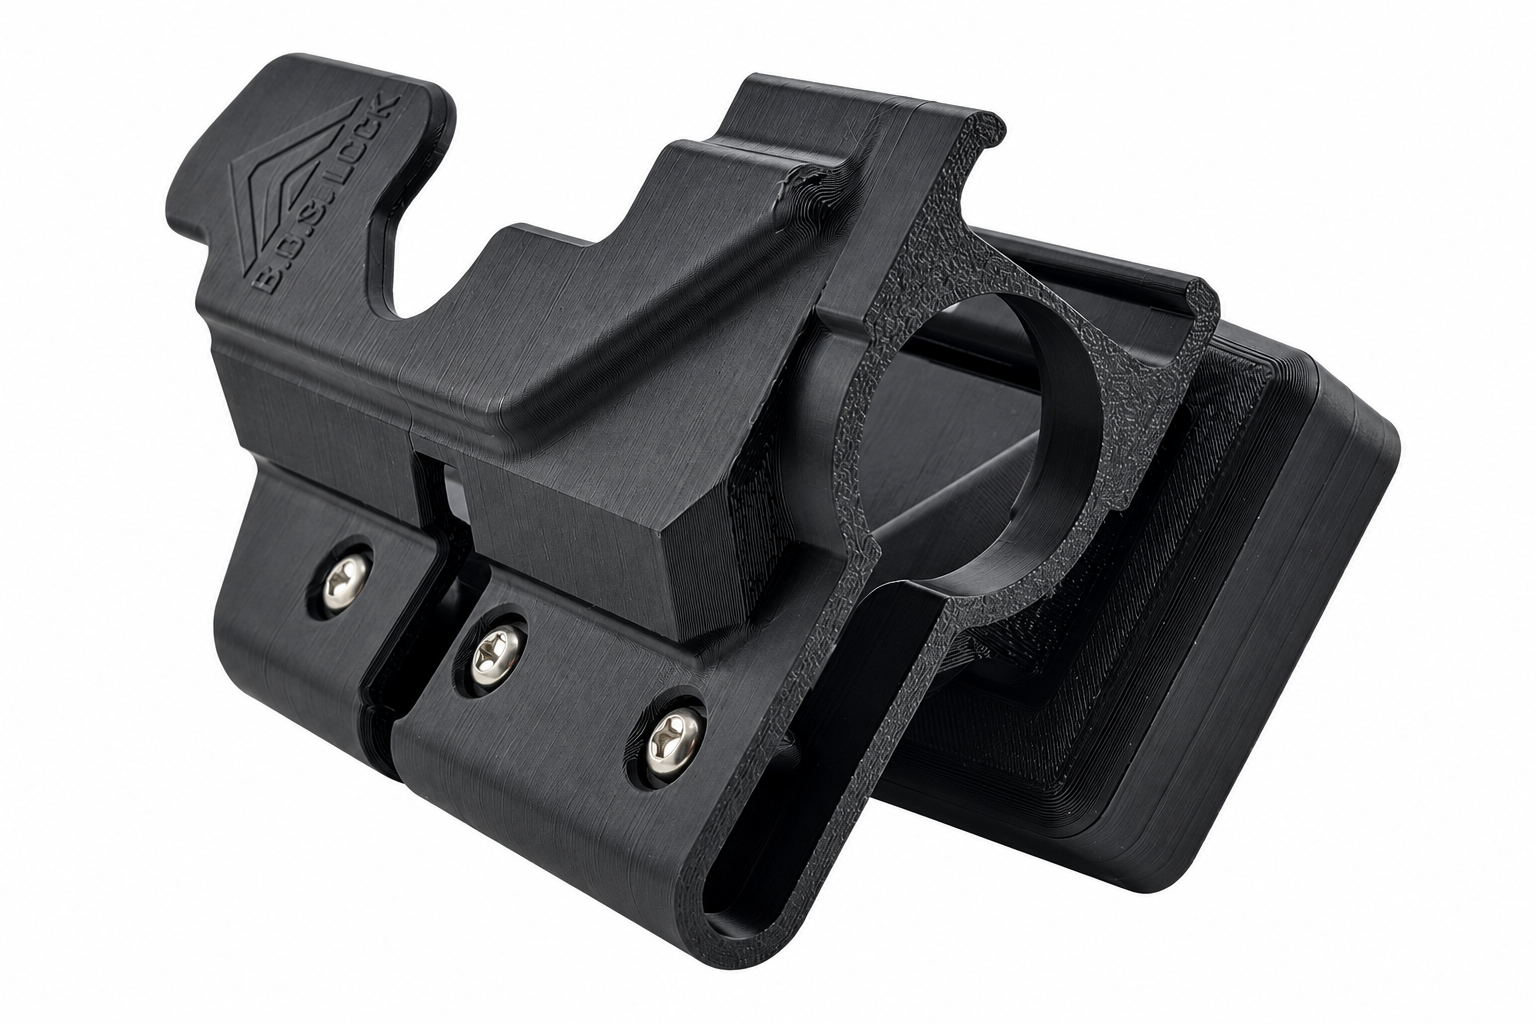
Intended Use
Important Safety Warnings
WARNING CALIFORNIA PROPOSITION 65 WARNING: B.O.S. Lock products can expose you to chemicals including CAS 1333-86-4 and Titanium dioxide, which is known to the State of California to cause cancer and birth defects or other reproductive harm. For more information, go to www.P65Warnings.ca.gov.
- Follow firearm safety rules. Treat every firearm as loaded. Keep the muzzle pointed in a safe direction. Keep your finger off the trigger until your sights are on target. Know your target and what is beyond it.
- Unload before setup. Remove the magazine and visually and physically verify the chamber is empty before installation, adjustment, inspection, or practice. Keep ammunition out of the work area and the firearm away from drilling.
- Retention is not a firearm lock. The Fusion Mounting Holster has no lock and does not indicate the chamber condition. The Fusion Mounting Holster should not be used as a lock or to prevent unauthorized access to a firearm mounted in it.
- Trigger access remains possible. Do not assume the mounting holster fully covers the trigger guard. Never put a finger or an object inside the mounting holster or trigger guard when seating or drawing the firearm.
- Choose a safe muzzle direction. Check what is beyond the mounting surface and in line with the muzzle. Do not aim toward an occupied space, bed, doorway, vehicle seat, or walkway. Confirm what is behind the surface before drilling.
- Keep unauthorized users from accessing. Do not rely on retention tension to prevent a child or another unauthorized person from removing the firearm. Reconsider any mounting location they can reach.
- Observe retention and carry limits. This mounting kit is not rated to retain a firearm against a deliberate grab, impact, crash, or fall. It was not designed for concealed or open carry. Keep the Fusion locked during use with the Fusion Mounting Holster.
- Stop using damaged parts. Stop using the product if any damage has occurred, including a cracked, warped, or heat-distorted mounting holster or mounting plate. Do not modify the parts or remove the tension screws. Keep the system away from excessive heat, prolonged direct sunlight, closed vehicles, and solvents.
Set up Instructions
Before You Begin
Included components for the Fusion Mounting Holster and Plate:
- 1 Fusion Mounting Holster with three preinstalled retention adjustment screws;
- 1 mounting plate;
- 4 mounting screws.
(Note: Contents vary when parts are purchased separately.)

What you will need: A correctly installed BOS-FS1 Fusion (not included), a No. 2 Phillips screwdriver, pencil, level, and mounting screws provided.
Before installation: Unload the firearm and ensure the chamber is clear, and remove the magazine. Inspect all parts, confirm that the Fusion is correctly installed, and check firearm and accessory clearance. If anything is missing or damaged, contact customer support before installing.
Component Reference
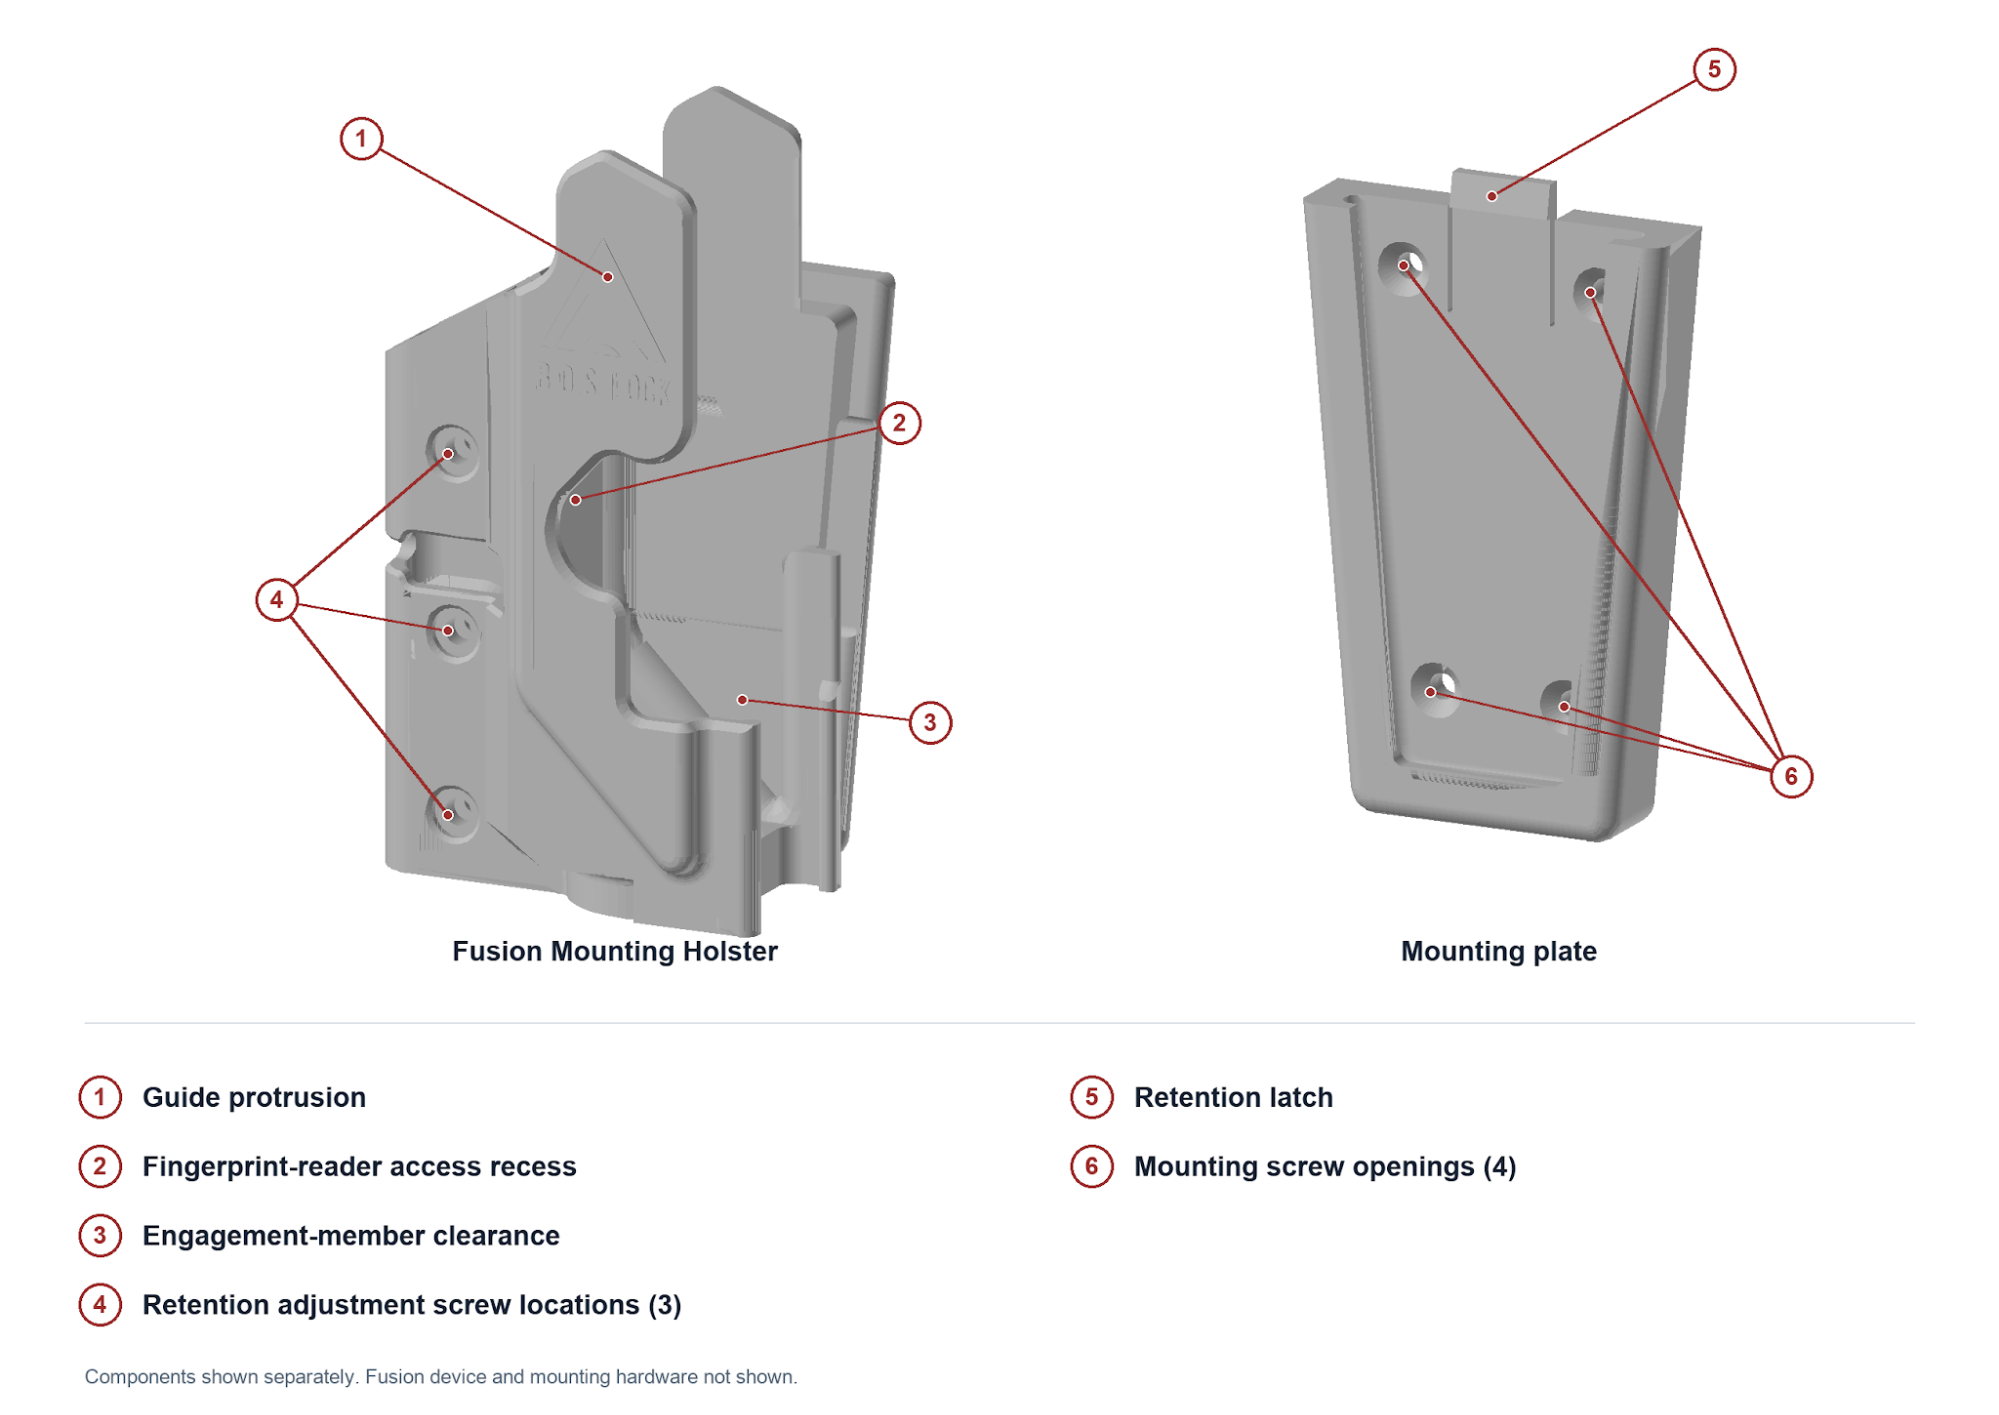
1. Choose the mounting location
Choose a sturdy surface that allows a safe muzzle direction, a full grip, access to the fingerprint reader, and clearance for the firearm and accessories. Hold the plate flat against the surface, with the retention latch end pointing up. Dry-fit the assembly before marking holes.
2. Install the mounting plate
Use one supplied mounting screw in each of the four attachment openings to secure the mounting plate to the mounting surface. The plate must sit flat without rocking. Pull on the installed plate by hand; if it moves, flexes, or creaks, stop and correct the installation. Do not mount into unsupported drywall.
3. Attach the mounting holster on the plate
Align the mounting holster’s wedge with the wide, grip-end opening of the mounting plate channel. Slide it toward the narrow, muzzle end until the latch seats. Feel for engagement; an audible click is not required. Pull back toward the grip end, then outward from the plate. The mounting holster must remain attached.
4. Adjust retention tension with the firearm unloaded
The factory preset tightening must be checked for your setup. Remove the mounting holster from the plate using the approved release procedure. Ensure the Fusion-equipped firearm is unloaded, and the magazine is removed, then insert it fully into the mounting holster. Adjust the three tension screws to balance retention and a smooth draw. Tightening increases tension; loosening reduces it. Keep every screw engaged and do not overtighten. Reattach the mounting holster and repeat the checks in the mounted position.
5. Complete the unloaded function check
Keep ammunition out of the room. Remove the magazine and visually and physically verify that the chamber is empty before completing every check below.
- Full seating: Seat the Fusion-equipped firearm fully in the mounting holster. It must remain seated without drooping or shifting.
- Fingerprint access and unlocking: Confirm that you can reach the fingerprint reader and unlock the Fusion while the firearm is seated, without binding or contact between its engagement member and the mounting holster.
- Slide position: Confirm that the slide returns fully to battery.
- Locked draw: With the Fusion locked, confirm that the firearm clears the mounting holster in a straight-out draw.
- Unlocked draw: With the Fusion unlocked, move the firearm forward away from the mounting surface, rotate slightly, then move up and out. Do not force a snagged draw.
- Retention and draw: Follow the full manual’s procedures for the 30-second inverted hold and firm mounting-surface shake check. The unloaded firearm must remain seated during both checks and clear in one continuous draw without a second pull.
- Final seating: Lock the Fusion, reseat the firearm fully, and confirm retention before letting go.
If retention and draw checks cannot both pass, stop and contact B.O.S. Lock customer support.
Before Each Use
Check full seating and retention. Recheck tension after the first week, after adjustment or relocation, and after changing firearms. Inspect the plate and latch weekly; repeat retention and draw checks monthly. Stop use after damage or any failed check. For cleaning, use a dry or lightly damp cloth; do not lubricate the mounting holster’s interior.
Customer support: support@boslock.com